
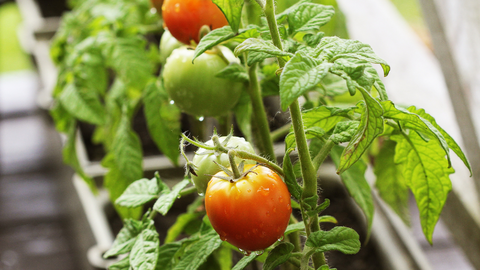
Dreaming of fresh, fragrant lemons but struggling with limited outdoor space? You're not alone. Many urban gardeners face the challenge of growing lemons indoors, only to be met with lackluster results. But with the right approach, you can cultivate a thriving lemon tree right in your living room, complete with vibrant blooms and zesty fruits. This guide will unveil the secrets to successfully growing lemons indoors, transforming your green thumb dreams into lush, lemony reality. Join us as we delve into the best varieties, care tips, and tools for indoor lemon cultivation.

Timing
Harvest from Year 2+ on.

Full sun
Equivalent of 7+ hours of direct sun [DLI of 21+ mol/m²/day].

Care
Intermediate. You’ll transplant, prune, and harvest.
Best Lemon varieties to grow inside.
Lemons have several varieties, but the most recommended ones to grow indoors are the dwarf ones. You can also grow the below varieties indoors:
Ponderosa
It is a citrus hybrid of a pomelo and a citron. Can be used in dishes like Moroccan tajines or eaten straight from the jar
AmazonMeyer
The layer of the bitter white pith that makes a thick protective coating for regular lemons is so thin on Meyers that they may be eaten in their entirety, peel included. They can be cut into thin slices, have their seeds removed, and roasted with root vegetables, chicken or fish.
AmazonPink Variegated
Excellent patio or container plant! It is an excellent landscape tree, known more for interesting variegated foliage than for fruit quality and quantity.
AmazonDwarf Eureka
California’s classic commercial lemon. Produces tart juice, and has a flavorful zesty peel. The heaviest fruit crop fall into winter, some fruit year-round
Amazon
Best Setup for Lemon Plants
You’ll need:
Planter:
A pot that is at least 12″ / 5 gal, though there is some flexibility. The plant will grow in proportion to its planter – so size is based on how tall you want your plant to grow.
Soil:
Free-Draining Mix
Plant Food:
Fruit Blend. This should be low in phosphorus (with NPK numbers like 8-3-10)
Grow Light:
A strong grow light that can give the equivalent of 7+ hours of direct sun [DLI of 21+ mol/m²/day].
Starting your Lemon: Seed vs Propagate
Lemon that’s grown to eat is usually started with a live plant or cutting. This is because plants grown from seeds will grow as “wild types” – meaning they won’t produce the same fruit they came from (think of crab apples!).
Why you shouldn’t start Lemon from seed
If you grow a Lemon from seed, it won’t grow “true to type” meaning the fruit you will get will be a weird cross between the many different varieties – and chances are it won’t taste very good. However, if you are growing it for a houseplant and don’t care about the produce – go ahead and plant the pit!
Propagating Lemon: How to Clone from a Stem Cutting

If you’ve already got a Lemon plant you love (or a friend does!) you can easily “clone” it with just sharp scissors and a clean glass of water. First, cut a couple 6” shoots of new growth (avoid anything woody). Next, remove the lower leaves, so the bottom half is just stem. Place in a glass of 3” of water, making sure the cut leaf spots are underwater. Place the glass on a bright windowsill and change the water every few days. In a couple of weeks, roots should emerge and you can transplant them into your container. While using additional rooting hormones won’t hurt, it’s not necessary with Lemon plants.
- Cut 6” section of new growth
- Remove leaves halfway and place them in the water on a sunny window sill
- Wait 56 days for a few ½ inch roots to form and carefully transplant into it final container
How to Transplant Lemon
![]()
Many nurseries ship Lemon as “Bare-Root” – this means the roots are not in soil and the plant is dormant. It’s a bit strange to receive something that looks like a bare stick, but it’s much easier to make sure you’re not bringing any pests in. To transplant your bare root Lemon plant:
- Prepare your pot by filling it ½ with soil and shaping it like a cone
- Prepare the plant roots by trim any that seem dead, mushy, or excessively long, then shape it like a cone to fit on your soil.
- Check the fit so that the highest roots are just below the rim of the pot. Adjust the soil as needed.
- Once the fit is good, fill the pot up to the highest roots, lightly tapping the soil down as you go. Finish up by giving it a good deep watering.
If you received your plant in a nursery container with soil, the process is much the same. Once it arrives, gently pull it out to check on the roots (adding water can help if it’s dry). If they’re not hitting the edge and there’s plenty of soil, then resist the urge to transplant it into a bigger pot. If the roots are crowded and starting to circle around the pot, then you’ll need to repot it. Use a slightly larger pot (2 to 3 inches larger in diameter). Fill the bottom with enough new soil so that the top of the nursery pot lines up with the top of the permanent container. Finish by filling around the edges and watering thoroughly.
Where to grow your Lemon plants
Lemon plants have the highest light needs of any plant – so unless you have a totally unobstructed southern-facing window and plan on only growing in the summer – you’ll need a grow light. We still recommend taking advantage of your bright window (sunlight is free and great for plants!) and supplement it with a grow light. For an introduction to grow lights, head over to our post on grow lights for indoor gardeners. We’ve also got a buying guide for screw in types, but to keep things simple in this guide, we’ll just provide directions for the 24W Screw in Bulb by Sansi, which we think is a good middle-of-the-road option.

How bright should your grow light be?
Lemon plants need the equivalent of 7+ hours of direct sunlight [DLI of 21+ mol/m²/day] to grow their best. In order to provide an equivalent amount with a grow light, it needs to be pretty bright! The 24W Sansi bulb should be placed 6 inches away from the top of the plant. This will give your PPFD (the standard measure of brightness) of 500 μmol/m²/s.
How many hours per day do your Lemon plants need under a grow light?
Lemon plants are known as “long-day” meaning that they develop faster with over 12 hours of light (and only need 6 hours of darkness to rest) so setting your timer to light your plants for 14+ hours is best.
Lemon Plants Grow Faster in Warmer Temps
Lemon plants are native to subtropical regions and like lots of heat, classifying them as “warm weather crops”. Sunnier and south-facing windows help keep things warmer – ideally 80°F but anything between 60 and 90°F is fine.
How to Prune Lemon Trees

Pruning is important for Lemon trees. Even dwarf varieties can easily grow up to 15 feet – and pruning keeps them easier to manage, care for, and fit in our living space. Beyond this, we help the plant focus its energy by limiting the number of branches we allow to develop. The basics of pruning are simple; plants grow from their tips (not bottom), but if you remove the tip it will redirect the growth to side branches. The art of pruning takes many forms, however – Bonsai, Espalier, and Spur are some ways the basic principles are applied. We encourage you to explore the look you want, but if you are unsure, open-center pruning is a well-established style for fruit trees.
The standard for most fruit trees is known as “Open Center Pruning” where the canopy consists of 3 or 4 evenly spaced main branches. This lets light and air penetrate through the center and reach the edges for an even, lush plant. Make the first cut when you are happy with the height of the trunk – it may happen as soon as you get your plant (we recommend letting the trunk be at least 2 ft above the soil). This cut should be right above a bud or branch coming off the main trunk. This will encourage the main branches to form, so if more than 3 or 4 come out then remove the extra with an eye to keep spacing even. The main pruning is now done, so just once or twice a year you’ll want to do a maintenance prune to remove any crossing or dead branches and keep the center short.
Year 1+: How to Pollinate Your Lemon Flowers

Lemon trees are self-fruitful, so there is no need to pollinate the flowers. After the flowers form, it generally takes 4 to 9 months to ripen.
Year 2+: How to Harvest Lemons
Lemons won’t ripen after they are harvested, so you’ll want to wait until they’re perfectly ripe on the plant. They should have rich color and smooth skin with no soft spots and come off the branch easily. It takes a little time to develop a feel – but the riper fruit will be denser – so go for the ones that feel heaviest for their size.
Year 10+: End of Life
Lemon trees typically live for about 50 years and will keep putting out lemons for their entire life. It’s important to keep them healthy with nutrients and regular pruning.
Shop This Blog
The right supplies can take the guesswork out of caring for your plants – and turn care from a daily to weekly routine. Through our grow tests, we’ve found these products to produce the best indoor Lemon (and also have simple maintenance). Plants are adaptable and can grow in many different conditions, so they are by no means necessary if you already have other supplies.
Best Containers for Lemon: Ceramic Self Watering Planters
Plants thrive on consistent moisture but can suffer if they’re waterlogged. A semi-porous ceramic self regulates ideal conditions. Our favorite is the COSWIP planter. Runner up is Self Watering Planter by Wet Pot.
Best Soil for Lemon: Free Draining Mix
Lemon needs a drier environment – so you are better off using a free-draining cactus potting mix – we like this Organic Mix by Espoma.
Best Nutrients for Lemon: Fruit Blend
Lemon likes nutrients that are low in phosphorus (with NPK numbers like 8-3-10). For a Fruit Blend we recommend: Espoma Citrus Tone
Best Light for Lemon: DIY or Soltech
There is a very small chance that you have the bright windows needed to grow these without a grow light. If you are looking for a higher-end option – we love the Aspect Light by Soltech. For a more affordable option, a DIY setup using a 24W Screw-in Bulb by Sansi with a Clamp Light and Mechanical Timer works well too. Check out our complete guide on a DIY setup for less than $40 or our buying guide for screw in bulbs.


There are no comments for this article. Be the first one to leave a message!